What are you looking for?

Search results will appear here

TAG: represent

70+ Bee Nail Designs for Buzzworthy Nails


Creating bee nail designs is a fun and unique way to show off your love for these buzzy creatures. Whether you’re a beekeeper, nature enthusiast, or just appreciate their important role in the ecosystem, bee nail designs are a great way to make a statement. Here are over 70 bee nail designs to inspire your next manicure:

Classic Bee Nail Designs


1. Start by painting your nails with a yellow base color.
2. Use black nail polish to create stripes on your nails to mimic a bee’s abdomen.
3. Add white dots to represent the bee’s wings.
4. Finish off with a small black dot for the bee’s head.

Abstract Bee Nail Designs


1. Paint each nail a different shade of yellow, black, or white.
2. Use a thin brush to create abstract bee-inspired designs on each nail.
3. Play around with different patterns and shapes to create a unique look.

Honeycomb Nail Designs


1. Start by painting your nails with a nude or yellow base color.
2. Use a thin brush to create honeycomb patterns on each nail using black nail polish.
3. Add small gold or yellow dots to represent honey in the honeycomb.
4. Finish off with a glossy top coat to give your nails a shiny finish.

3D Bee Nail Designs


1. Start by painting your nails with a yellow base color.
2. Use black nail polish to create a 3D bee design on one or two of your nails.
3. You can use small rhinestones or nail art stickers to create the bee’s wings and stripes.
4. Finish off with a clear top coat to seal in your design.

Gradient Bee Nail Designs


1. Paint each nail with a gradient of yellow and black nail polish.
2. Use a sponge to create a smooth transition between the two colors.
3. Add a bee-inspired accent nail using black and white nail polish.
4. Finish off with a matte top coat for a modern look.

Glitter Bee Nail Designs


1. Start by painting your nails with a yellow or black base color.
2. Use glitter nail polish to create a sparkly bee design on one or two of your nails.
3. You can add rhinestones or glitter accents to enhance your bee design.
4. Finish off with a glossy top coat to make your nails shine.

French Tip Bee Nail Designs


1. Paint your nails with a clear base coat.
2. Use yellow nail polish to create a French tip on each nail.
3. Add black stripes and white dots to mimic a bee’s body and wings.
4. Finish off with a clear top coat to seal in your design.

Watercolor Bee Nail Designs


1. Paint each nail with a white base color.
2. Use watercolor nail polish to create a bee-inspired design on each nail.
3. Play around with different colors and patterns to create a unique watercolor effect.
4. Finish off with a clear top coat to protect your design.

Conclusion


Next time you’re looking to spice up your manicure, consider trying out one of these bee nail designs. Whether you’re a beginner or a nail art expert, there’s a bee-inspired design for everyone. Show off your love for these important pollinators with buzzworthy nails that will surely turn heads.

70+ Bee Nail Designs [2023] For Buzzworthy Nails


Are you looking to create some buzz with your nail art? Bee nail designs are the perfect choice for anyone who wants to show off their love for these adorable insects. Whether you prefer a subtle nod to bees or a more bold and vibrant look, there are endless possibilities when it comes to bee nail designs. In this article, we will provide you with over 70 bee nail design ideas that are sure to make your nails the talk of the town in 2023.


How to Achieve Bee Nail Designs


Creating bee nail designs may seem like a daunting task, but with the right tools and techniques, you can easily achieve stunning results. Here are some steps to help you create buzzworthy bee nail designs:


  • Start by prepping your nails with a base coat to protect them and help the nail polish adhere better.

  • Choose a yellow nail polish as the base color for your bee nail design. Apply two coats for full coverage.

  • Using a nail art brush or a toothpick, create black stripes on your nails to mimic the look of a bee’s abdomen.

  • Add black dots at the tip of your nails to represent the bee’s stinger.

  • Finish off your bee nail design with a clear top coat to seal in the design and add shine.


70+ Bee Nail Design Ideas


Now that you know how to achieve bee nail designs, let’s dive into some inspiration for your next manicure. Here are over 70 bee nail design ideas that are perfect for any occasion:


  • Classic yellow and black stripes

  • Black and white honeycomb pattern

  • 3D bee accents

  • Gold foil bee wings

  • Glittery bee designs

  • Watercolor bee nail art

  • French tip bee nails

  • Matte bee nail designs

  • Geometric bee patterns

  • Abstract bee nail art


These are just a few ideas to get you started, but the possibilities are truly endless when it comes to bee nail designs. Feel free to get creative and customize your bee nail art to suit your personal style.


Tips for Maintaining Bee Nail Designs


Once you’ve created your buzzworthy bee nail designs, here are some tips to help you maintain them and keep your nails looking fabulous:


  • Avoid using your nails as tools to prevent chipping or peeling of the nail art.

  • Apply a fresh coat of top coat every few days to keep your bee nail designs looking fresh and glossy.

  • Use cuticle oil regularly to keep your nails and cuticles hydrated and healthy.

  • Avoid harsh chemicals or cleaning products that can damage your nail art.

  • Visit a professional nail technician for touch-ups or repairs if needed.


With these tips in mind, you can enjoy your beautiful bee nail designs for weeks to come.


Conclusion


Bee nail designs are a fun and trendy way to show off your love for these adorable insects. With over 70 bee nail design ideas to choose from, you can easily create buzzworthy nails that are sure to turn heads in 2023. Whether you prefer a simple and classic look or a more intricate and detailed design, there is a bee nail design out there for everyone. So why wait? Get buzzing with your bee nail designs today!

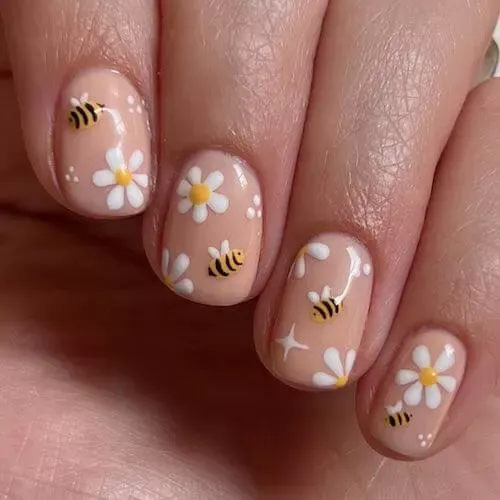
Cute Short Thanksgiving Nails Ideas


1. Turkey Nails


Start by painting your nails in a neutral shade like beige or brown. Then, use a nail art brush to create turkey feathers on one nail, and add a cute turkey face on another nail. Finish off with some orange and red dots for the turkey’s feathers.


2. Pumpkin Spice Nails


For this look, paint your nails in a warm orange shade. Next, use a nail art brush to create little pumpkin designs on each nail. Add some brown and green accents to complete the pumpkin spice look.


3. Fall Leaves Nails


Paint your nails in a dark green or burgundy shade, then use a nail art brush to create different colored fall leaves on each nail. Add some gold glitter accents for a touch of sparkle.


4. Cornucopia Nails


Start by painting your nails in a deep purple shade. Then, use a nail art brush to create a cornucopia design on one nail, filled with fall fruits and vegetables. Add some gold accents for a festive touch.


5. Acorn Nails


Paint your nails in a light brown shade, then use a nail art brush to create little acorn designs on each nail. Add some gold glitter accents for a touch of glam.


6. Thanksgiving Feast Nails


For this fun look, paint each nail a different color to represent different Thanksgiving foods like turkey, mashed potatoes, cranberry sauce, and pumpkin pie. Add some cute food designs with a nail art brush for a festive touch.


How to Achieve These Cute Short Thanksgiving Nails


  1. Start by prepping your nails – trim, shape, and buff them.

  2. Apply a base coat to protect your nails.

  3. Paint your nails in a shade that matches your chosen Thanksgiving design.

  4. Use a nail art brush to create your desired design on each nail.

  5. Add any additional accents like glitter or rhinestones.

  6. Finish off with a top coat to seal in your design and add shine.


With these cute short Thanksgiving nails, you’ll be ready to celebrate the holiday in style. Whether you choose a turkey, pumpkin spice, or fall leaves design, your nails will be the perfect finishing touch to your Thanksgiving look. Have fun with these festive nail designs and show off your holiday spirit!

Are you looking for some cute and stylish nail art ideas to celebrate Thanksgiving in style? Look no further! We have gathered 50+ adorable short Thanksgiving nail designs to inspire you. From turkeys to pumpkins to fall leaves, these designs are perfect for the holiday season. Follow our step-by-step instructions to achieve these looks at home.

1. Turkey Nail Art


Create a cute turkey design on your nails using nail polish in brown, orange, red, and yellow. Start by painting your nails with a brown base color. Then, use a thin brush to draw the turkey’s body and head on one nail. Add feathers using different colors, and finish off with two small dots for the eyes and a triangle for the beak.

2. Pumpkin Patch Nails


For a festive pumpkin patch nail art, paint your nails with a pumpkin orange base color. Use a thin brush to create small pumpkins on each nail, varying the sizes and shapes. Add green stems on top of each pumpkin, and finish off with some brown lines to represent the patch.

3. Fall Leaves Nail Design


Embrace the beauty of fall with a stunning fall leaves nail design. Start by painting your nails with a nude base color. Use a thin brush to create different colored leaves on each nail, including shades of red, orange, yellow, and brown. Add some gold accents for a touch of elegance.

4. Harvest Corn Nails


Celebrate the harvest season with a fun harvest corn nail art design. Paint your nails with a yellow base color. Use a thin brush to draw corn kernels in shades of yellow and brown on each nail. Add green husks at the top of each nail for a realistic touch.

5. Thanksgiving Feast Nails


Create a Thanksgiving feast nail art design by painting different Thanksgiving foods on each nail. From turkey to mashed potatoes to pumpkin pie, the possibilities are endless. Use a thin brush to add details and textures to each food item for a mouth-watering look.

6. Give Thanks Nails


Show your gratitude with a “Give Thanks” nail art design. Paint your nails with a neutral base color. Use a thin brush to write “Give Thanks” on one nail, adding flourishes and decorations for a festive touch. You can also add small hearts or pumpkins for extra flair.

7. Autumn Stripes Nail Art


Create a chic autumn stripes nail art design by painting your nails with different fall colors. Use striping tape or a thin brush to create striped patterns on each nail, incorporating shades of orange, red, brown, and gold. Finish off with a top coat for a glossy finish.

8. Acorn Nails


Embrace the beauty of nature with an acorn nail art design. Paint your nails with a brown base color. Use a thin brush to draw acorns on each nail, adding details like the cap and stem. You can also add some fall leaves or acorn clusters for a whimsical touch.

9. Thanksgiving Plaid Nails


Get cozy with a Thanksgiving plaid nail art design. Paint your nails with a neutral base color. Use striping tape or a thin brush to create a plaid pattern on each nail, incorporating fall colors like orange, red, and yellow. Finish off with a matte top coat for a trendy look.

10. Give Thanks French Tips


Elevate your French manicure with a “Give Thanks” twist. Paint your nails with a nude base color. Use a thin brush to write “Give Thanks” on the tip of each nail, adding small details like hearts or pumpkins. Finish off with a glossy top coat for a polished finish.

With these 50+ cute short Thanksgiving nail designs, you can celebrate the holiday season in style. Whether you prefer turkeys, pumpkins, or fall leaves, there is a design for everyone. Follow our step-by-step instructions to achieve these looks at home and show off your festive spirit this Thanksgiving.

×Optimized Ad
×Optimized Ad