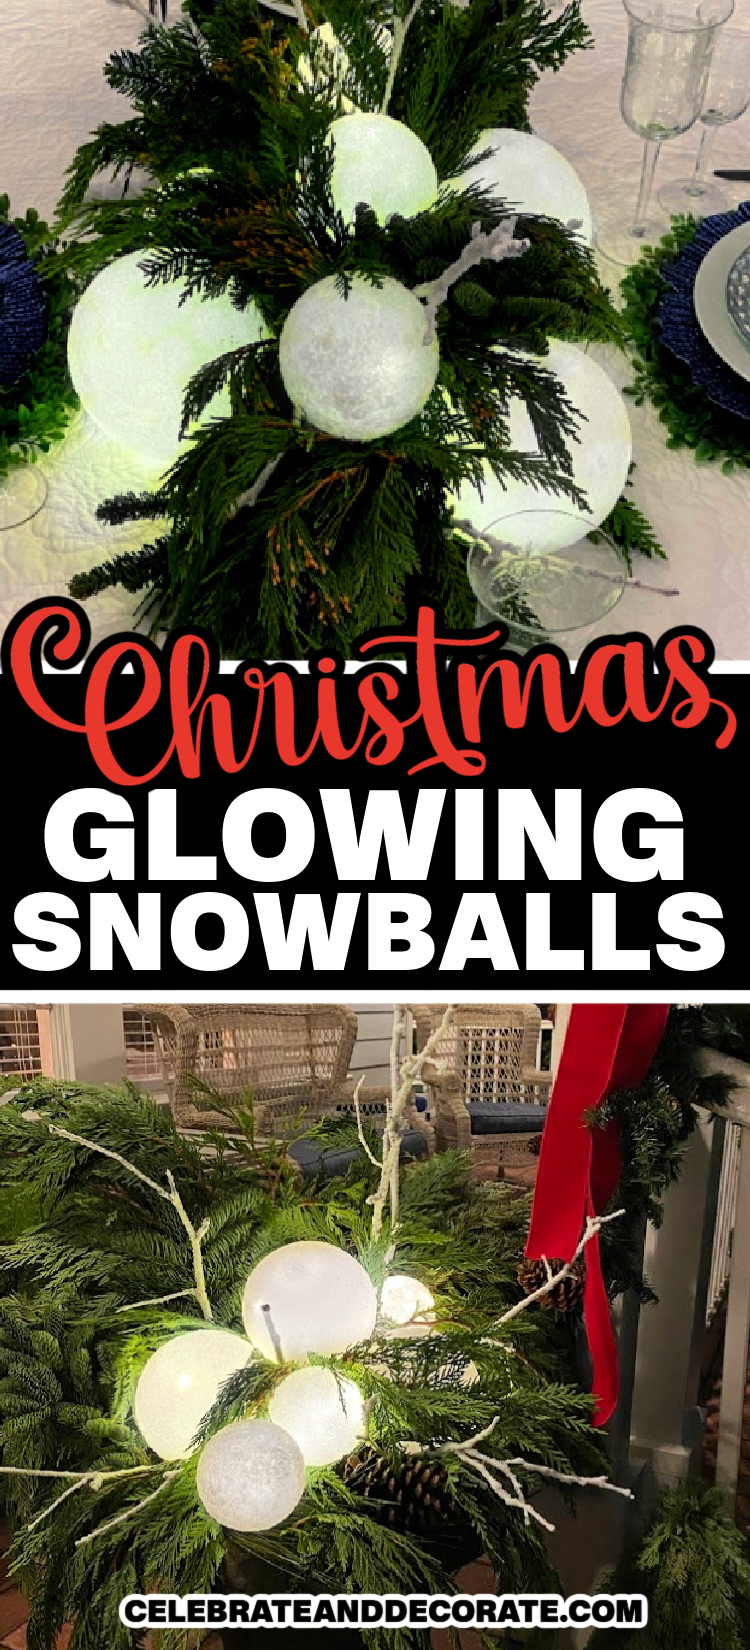

Winter is a magical season filled with twinkling lights, cozy fires, and shimmering snow. If you’re looking to add a warm glow to your winter decorations, look no further than these DIY Glowing Snowballs. These whimsical decorations are simple to make and can be used both indoors and outdoors to create a captivating centerpiece for your winter festivities. Let’s dive into the step-by-step process of creating these beautiful glowing snowballs.
Materials You’ll Need
Before you get started, gather the following materials:
– White cotton batting or cotton balls
– String lights (white or colored, depending on your preference)
– Clear tape
– Scissors
– Large bowls
– Glue gun and glue sticks
– Optional: glitter, fake snow, or other embellishments
Step 1: Forming the Snowballs
To create the base of your glowing snowballs, you’ll need to start by forming the snowball shapes using the white cotton batting or cotton balls. If you’re using cotton batting, take a handful and gently shape it into a ball. If you’re using cotton balls, you can simply use several of them to create the desired size of your snowball. Once you have your initial shape, continue adding more cotton batting or cotton balls until your snowball reaches the desired size.
Step 2: Adding the Lights
Next, it’s time to add the string lights to your snowballs. Take the clear tape and use it to secure the end of the string lights to the bottom of the snowball. Then, begin wrapping the string lights around the snowball, making sure to evenly distribute the lights as you go. As you continue wrapping, be sure to leave enough slack at the end of the string lights to reach the power source. Once you’ve wrapped the entire snowball, secure the end of the string lights in place with more clear tape.
Step 3: Securing the Lights
To ensure that the lights stay in place, use a glue gun to secure the string lights to the cotton batting or cotton balls. This will prevent the lights from unraveling and will also help distribute the weight of the lights more evenly across the snowball. Be sure to use caution when using the glue gun, as the glue can become very hot.
Step 4: Adding Embellishments (Optional)
If you want to give your glowing snowballs an extra touch of sparkle, consider adding some embellishments. You can use a glue gun to attach glitter, fake snow, or other decorative elements to the surface of the snowballs. This is a great opportunity to get creative and tailor your glowing snowballs to fit your personal style and aesthetic.
Step 5: Displaying Your Glowing Snowballs
Once your glowing snowballs are complete, it’s time to find the perfect place to display them. These decorations can be used indoors or outdoors, so consider placing them on your mantelpiece, as a centerpiece for your dining table, or outside to add a warm glow to your winter landscape. If you don’t have a power source nearby, battery-operated string lights can be used for outdoor displays.
In conclusion, DIY Glowing Snowballs are a simple and beautiful way to add a warm glow to your winter decorations. With just a few materials and some creativity, you can create a captivating centerpiece that will bring a touch of magic to your winter festivities. Whether you place them indoors or outdoors, these glowing snowballs are sure to enchant anyone who sees them. So gather your materials and get ready to make your winter decorations come alive with these DIY Glowing Snowballs!
You can review our digital products by following us on Etsy.


