Introduction
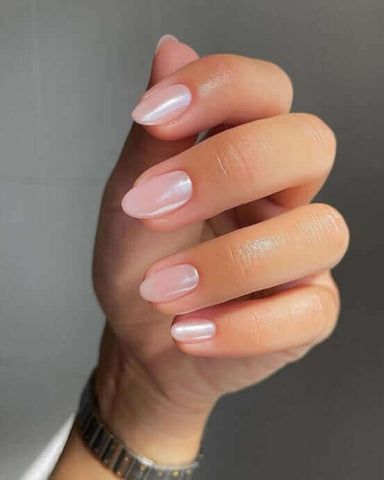
Are you a fan of donuts and looking for a creative way to express your love for them? Why not try DIY glazed donut nails at home? This fun and delicious nail art design is perfect for donut lovers who want to add a sweet and playful touch to their manicure. In this article, we’ll walk you through the steps to achieve the perfect glazed donut nail art look.
Step 1: Gather Your Supplies
Before you get started, you’ll need to gather all the necessary supplies. Here’s what you’ll need:
- Nude or light brown nail polish
- White nail polish
- Pink or pastel colored nail polish
- Chocolate brown nail polish
- Top coat
- Small nail art brush
- Dotting tool or toothpick
- Nail polish remover
- Cotton pads or q-tips
Step 2: Prep Your Nails
Start by prepping your nails. Remove any old nail polish and shape your nails to your desired length and shape. Once your nails are clean and dry, apply a base coat to protect your natural nails and help the polish adhere better.
Step 3: Apply the Base Colors
Once the base coat is dry, it’s time to apply the base colors for your glazed donut nails. Start by painting all of your nails with the nude or light brown nail polish as the base color. This will serve as the “donut” part of your nail art.
Once the base color is dry, use the white nail polish to create the icing on the donut. You can do this by painting a wavy line across the top of your nail to mimic the shape of icing on a donut. The white icing should cover about a third of your nail, leaving the bottom portion as the donut base.
Step 4: Add Sprinkles
Now it’s time to add some sprinkles to your glazed donut nails. Using the small nail art brush, dip it into the pink or pastel colored nail polish and create small dots or lines on the white icing to mimic sprinkles. You can also use a dotting tool or a toothpick to create different sized sprinkle dots for a more realistic look.
Step 5: Create the Chocolate Drizzle
To complete the glazed donut nail art look, you’ll want to add a chocolate drizzle on top of the icing. Use the chocolate brown nail polish and a small nail art brush to create thin, wavy lines on top of the white icing. This will give the illusion of a delicious chocolate drizzle on your donut nails.
Step 6: Seal the Look
Once you’re happy with your glazed donut nail art, it’s time to seal the look with a top coat. Apply a generous coat of top coat to protect your manicure and give it a glossy finish. This will also help to smooth out any lumps or bumps from the nail art.
Final Thoughts
Congratulations, you’ve now achieved the perfect glazed donut nail art look! This fun and playful design is perfect for anyone who loves donuts and wants to add a touch of sweetness to their manicure. With the right tools and a little bit of patience, you can easily recreate this delicious nail art at home. So go ahead and indulge in some glazed donut nails for a fun and unique manicure!
You can review our digital products by following us on Etsy.


