

Introduction
Water marble nail design is a trendy and fun way to create unique and eye-catching nail art. In this tutorial, we will guide you through the process of creating the perfect water marble nail design step by step. Follow along and unleash your creativity!
Materials Needed
- Nail polish in multiple colors
- A small cup or bowl filled with room temperature water
- Clear tape or liquid latex
- Orange stick or toothpick
- Base coat and top coat
- Nail polish remover
Step 1: Prepare Your Nails
Start by applying a base coat to protect your nails and help the nail polish adhere better. Once the base coat is dry, apply a white nail polish as a base color for the water marble design. This will help the colors pop and create a vibrant look.
Step 2: Protect Your Skin
To prevent the nail polish from staining your skin, apply clear tape or liquid latex around your nails. This will make cleanup easier and ensure a clean and polished look.
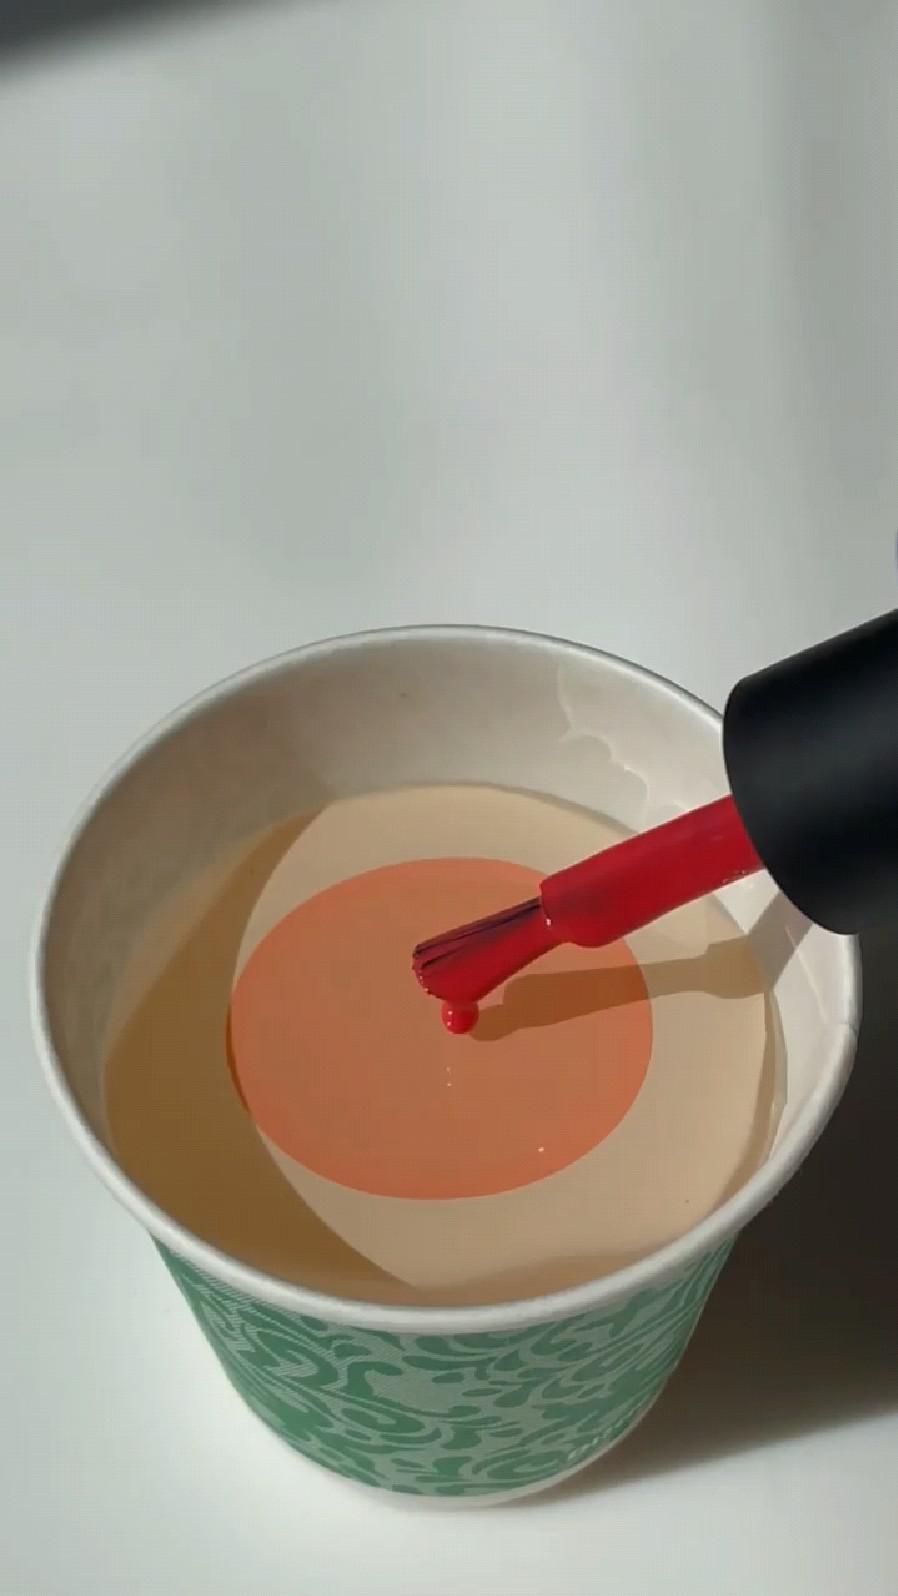
Step 3: Create the Water Marble Design
- Fill a cup or bowl with room temperature water.
- Drop one drop of nail polish into the water. The nail polish should spread out on the surface of the water.
- Repeat with different colors, creating concentric circles or any desired pattern.
- Use an orange stick or toothpick to create a design by dragging the colors together.
- Once you are happy with the design, dip your nail into the water, submerging it completely.
- Use the orange stick to remove any excess nail polish from the surface of the water.
- Slowly lift your nail out of the water, and you will see the water marble design transferred onto your nail.
Step 4: Clean Up
Use a cotton swab dipped in nail polish remover to clean up any excess nail polish on your skin. Gently remove the tape or liquid latex to reveal a clean and polished nail design.
Step 5: Apply Top Coat
Finish off your water marble nail design with a layer of top coat to seal in the design and add shine. This will also help protect your nail art and make it last longer.
Conclusion
Congratulations! You have now created the perfect water marble nail design. Experiment with different color combinations and patterns to create unique and stunning nail art. Have fun and show off your beautiful nails!
Remember to share your creations on social media and tag us so we can see your amazing water marble nail designs!
You can review our digital products by following us on Etsy.


