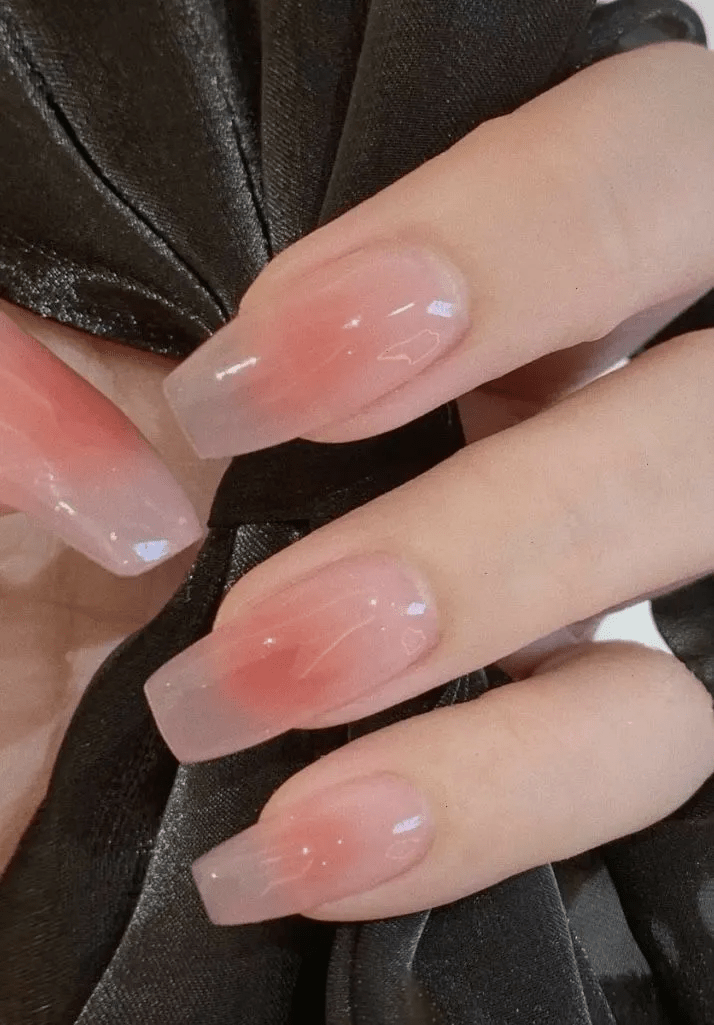
Introduction to Jelly Nails Trend
The viral jelly nails trend has taken the internet by storm, with its translucent and colorful appearance. This fun and trendy nail look can be achieved at home on a budget with a few simple steps and affordable materials. Follow along with our DIY guide to learn how to create your own jelly nails at home without breaking the bank.
Materials Needed
- Gel polish in translucent or sheer colors
- Clear nail polish or top coat
- Nail tips (optional)
- Nail file/Buffer
- UV or LED nail lamp
- Nail glue (if using nail tips)
- Nail polish remover
- Cuticle pusher
Step 1: Prep Your Nails
Start by removing any existing nail polish and shaping your nails to your desired length and shape. Use a cuticle pusher to push back your cuticles and ensure a clean nail bed for the gel polish application.
Step 2: Apply Gel Polish
Apply a thin layer of clear gel polish as a base coat to protect your natural nails. Then, apply 2-3 coats of your chosen translucent or sheer gel polish color, curing each layer under a UV or LED nail lamp according to the manufacturer’s instructions.
Step 3: Optional – Nail Tips
If you want to achieve longer jelly nails, you can opt to apply nail tips before the gel polish application. Use nail glue to adhere the tips to your natural nails, then follow the same steps to apply the gel polish over the tips.
Step 4: Apply Clear Top Coat
Once the gel polish layers have been cured, apply a clear top coat to seal in the color and add a glossy finish to your jelly nails. Make sure to cap the free edge of your nails to prevent chipping and peeling.
Step 5: Clean Up
Use a nail polish remover and cotton pad to clean up any excess gel polish or top coat that may have gotten on your skin during the application process. This will give your jelly nails a clean and professional look.
Tips for Maintaining Jelly Nails
- Avoid using your nails as tools to prevent chipping or lifting of the gel polish.
- Apply cuticle oil regularly to keep your nails and cuticles hydrated and healthy.
- Wear gloves when doing household chores or working with harsh chemicals to protect your jelly nails.
- Schedule regular touch-ups to fill in any gaps or regrowth near the cuticle area.
Final Thoughts
Creating the viral jelly nails trend at home on a budget is a fun and creative way to achieve a trendy nail look without spending a fortune at the salon. With the right materials and a little patience, you can rock your own DIY jelly nails and show off your unique style. Give it a try and see how this fun and colorful trend can elevate your nail game!
You can review our digital products by following us on Etsy.


