
It’s the most wonderful time of the year, and what better way to celebrate than with some festive and fun candy cane nail art? With the holidays just around the corner, it’s the perfect opportunity to get into the jingle bell groove and spread some Christmas cheer with a playful and eye-catching manicure. So, let’s dive into the world of candy cane nails and discover how to rock this merry look all season long!
What You’ll Need to Get Started
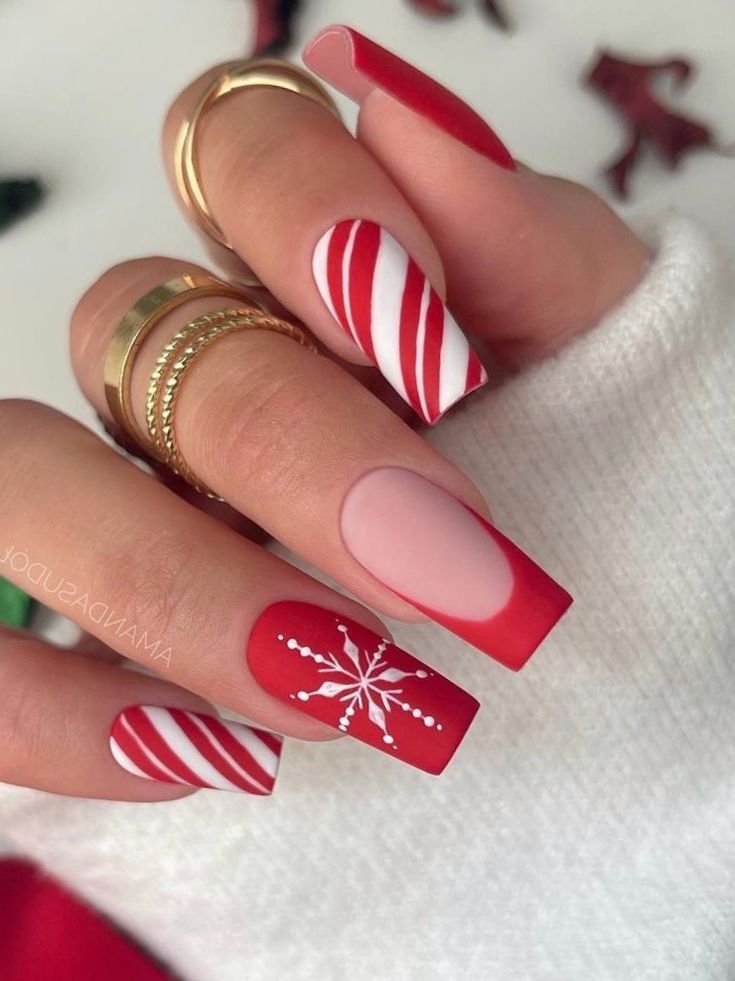
To create the perfect candy cane nail art, you’ll need a few essential supplies. First, you’ll need a base coat to protect your natural nails and provide a smooth surface for the nail polish. You’ll also need a white nail polish, a red nail polish, and a thin nail art brush or toothpick to create the candy cane stripes. Lastly, don’t forget a top coat to seal in your festive design and make it last throughout the holiday season.
Creating the Perfect Candy Cane Design
Start by applying a base coat to all of your nails. This will help protect your natural nails and provide a smooth surface for the nail polish. Once the base coat is dry, apply a layer of white nail polish to all of your nails. This will serve as the base color for your candy cane design.
Next, using a thin nail art brush or toothpick, create diagonal red stripes on each nail to mimic the look of a candy cane. Start by painting a diagonal stripe from the top left corner of the nail to the bottom right corner using the red nail polish. Then, create another diagonal stripe from the top right corner to the bottom left corner to complete the candy cane design. Repeat this process on each nail until you have a playful candy cane design on all of your nails.
Adding the Finishing Touches
Once the candy cane design is complete, apply a top coat to seal in your festive look and make it last all season long. This will also provide a glossy finish and protect your nail art from chipping or fading.
Now that your candy cane nails are complete, it’s time to show them off and spread some Christmas cheer!
Tips for Rocking Your Candy Cane Nails
– Keep your nails short and neat to ensure the candy cane design stands out and looks polished.
– Experiment with different color combinations such as green and white or silver and red for a unique twist on the classic candy cane look.
– Add some extra sparkle and shine with glitter nail polish or rhinestones for a festive touch.
– Don’t forget to moisturize your hands and cuticles to keep your nails looking their best all season long.
Spreading Christmas Cheer with Your Festive Manicure
Now that your candy cane nails are complete, it’s time to spread some Christmas cheer and show off your festive manicure! Whether you’re attending a holiday party, gathering with friends and family, or simply want to add a merry touch to your everyday look, your candy cane nails are sure to be a hit. Plus, they’re a fun and playful way to embrace the holiday spirit and get into the jingle bell groove.
In conclusion, candy cane nails are a fun and festive way to embrace the holiday season and spread some Christmas cheer with a playful manicure. The classic red and white stripes are a timeless symbol of the holidays and are an easy and eye-catching nail art design to create at home. So, gather your supplies, get into the jingle bell groove, and rock your candy cane nails all season long!
By following these simple tips and tricks, you can create the perfect candy cane nails to spread some festive joy and get into the holiday spirit. So, gather your supplies, get into the jingle bell groove, and rock your candy cane nails all season long!
You can review our digital products by following us on Etsy.


