

HTML Heading 3: Easy Recycled Ornaments Transformation
Are you looking for a quick and easy way to spruce up your old Christmas ornaments? With just a few simple materials, you can give new life to your old decorations and create beautiful, unique pieces for your holiday decor. In this article, we will show you how to recycle your old ornaments with some craft paint in just minutes, leaving you with a stunning set of velvety stone-inspired decorations for your Christmas tree and beyond.
Summary list 1:
– Quick and easy transformation of old ornaments
– Materials needed: old ornaments, craft paint
– Create unique, velvety stone-inspired decorations
HTML Heading 3: Materials Needed
To get started, you will need the following materials:
– Old Christmas ornaments
– Craft paint in various colors
– Paintbrushes
– Newspaper or a drop cloth to protect your work surface
– Optional: Sealant spray for added durability
Summary list 2:
– Old Christmas ornaments
– Craft paint in various colors
– Paintbrushes
– Newspaper or a drop cloth
– Sealant spray (optional)
HTML Heading 3: Step-by-Step Instructions
Step 1: Prep Your Work Area
Lay down newspaper or a drop cloth to protect your work surface from any paint spills or splatters. This will make cleanup a breeze and ensure that your crafting area stays tidy.
Step 2: Choose Your Color Palette
Select the colors you want to use for your ornaments. You can choose traditional holiday hues like red, green, and gold, or go for a more modern and unexpected color scheme. The choice is yours!
Step 3: Paint Your Ornaments
Using the paintbrushes, apply the craft paint to your old ornaments. You can use a variety of techniques such as stippling, swirling, or layering to create different textures and patterns on the surfaces of the ornaments. Don’t be afraid to get creative and experiment with different paint applications.
Step 4: Let Them Dry
Allow the painted ornaments to dry completely before handling them. Depending on the type of paint you used, this may take anywhere from a few hours to overnight. Be patient, as ensuring they are fully dry will help prevent smudges and smears.
Step 5: Optional: Seal Your Ornaments
If you want to ensure that your newly painted ornaments will last for years to come, consider spraying them with a sealant spray. This will help protect the paint from chipping or flaking off and give the ornaments a more polished finish.
Summary list 3:
– Lay down newspaper or a drop cloth to protect your work surface
– Choose your color palette
– Apply the craft paint to your old ornaments
– Allow the ornaments to dry completely
– Consider spraying them with a sealant for added durability
HTML Heading 3: The Final Result
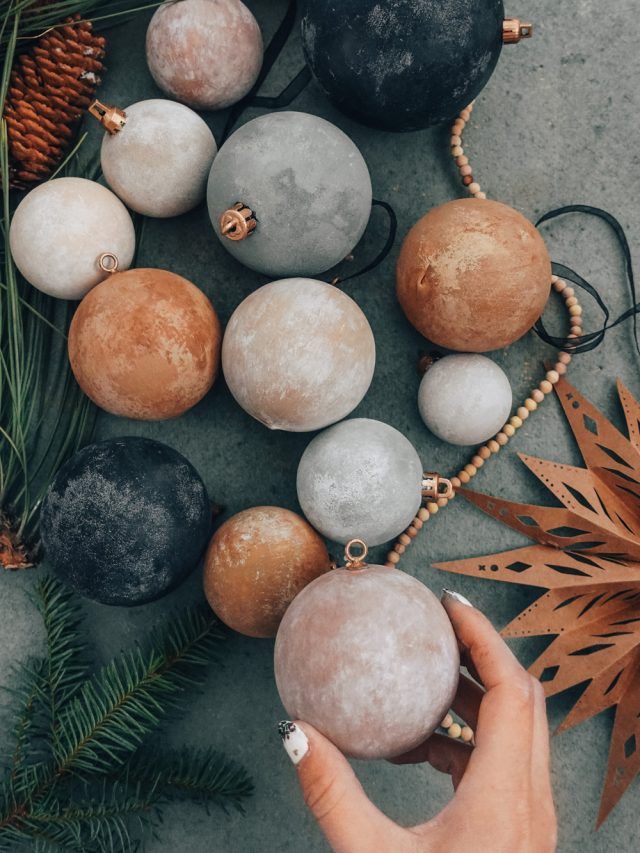
Once your ornaments are dry and, if desired, sealed, you’ll be left with a stunning set of velvety stone-inspired decorations that are perfect for hanging on your Christmas tree or using in other holiday decor. The transformed ornaments will have a unique and modern look that will impress all your holiday guests.
Summary list 4:
– Stunning set of velvety stone-inspired decorations
– Perfect for hanging on your Christmas tree
– Unique and modern look for your holiday decor
In conclusion, with just a few simple materials and a little creativity, you can give new life to your old, worn out Christmas ornaments. This easy and quick project is a great way to add some unique flair to your holiday decor while also reducing waste by repurposing old decorations. So gather your supplies and get ready to transform your old ornaments into beautiful, velvety stone-inspired decorations that will be the talk of the holiday season.
You can review our digital products by following us on Etsy.


