
Get in the Festive Spirit with Christmas Tree Nail Art
As the holidays approach, it’s the perfect time to add some sparkle and festive cheer to your everyday look. And what better way to do that than with Christmas tree nail art? This fun and festive nail design is a great way to get into the holiday spirit and show off your love for the season.
1. The Magic of Christmas Tree Nail Art
Adding Christmas tree nail art to your manicure is a surefire way to make a statement and spread some holiday cheer. Whether you’re attending a holiday party, exchanging gifts with friends and family, or simply want to get into the festive spirit, this nail design is a fun and creative way to celebrate the season.
2. How to Achieve the Perfect Christmas Tree Nail Art
Creating Christmas tree nail art is easier than you might think, and you don’t have to be a professional nail artist to achieve this look. With a few simple tools and a bit of creativity, you can have festive and eye-catching nails in no time.
3. Start with a Festive Base Color
The first step to achieving the perfect Christmas tree nail art is to start with a festive base color. Classic holiday colors like red, green, or gold work well, but feel free to get creative and choose a color that speaks to you. Consider using a glittery or shimmery polish for some extra sparkle.
4. Create the Christmas Tree Design
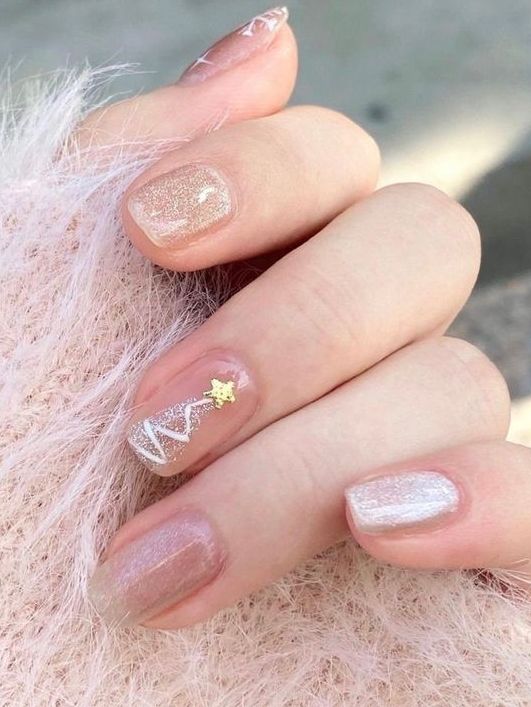
Once your base color is dry, it’s time to create the Christmas tree design. Using a thin nail art brush or a toothpick, draw a triangle shape in the center of each nail to represent the tree. Then, add small lines to mimic the branches of the tree, ensuring that they get shorter as you move down the triangle.
5. Add Some Festive Decorations
No Christmas tree is complete without some decorations, and the same goes for your Christmas tree nail art. Use different colored nail polishes or nail art pens to add ornaments, garlands, and a star or a snowflake on top of the tree. Get creative and have fun with it!
6. Finish with a Top Coat
To ensure that your Christmas tree nail art lasts throughout the holiday season, finish off your manicure with a top coat. This will not only seal in your design but also add some extra shine and protection to your nails.
7. Spread Some Holiday Cheer
Once you’ve perfected your Christmas tree nail art, it’s time to show it off and spread some holiday cheer. Whether you’re at a holiday party, gathering with friends and family, or simply out and about, your festive nails are sure to be a conversation starter and bring smiles to those around you.
8. Conclusion
With Christmas just around the corner, now is the perfect time to add some festive flair to your nail routine with Christmas tree nail art. Whether you choose to go all out with a detailed design or keep it simple with a nod to the holiday season, this fun and festive nail art is a great way to get into the holiday spirit and spread some Christmas magic wherever you go. So, gather your favorite nail polishes and get ready to shine this holiday season with Christmas tree nail art!
You can review our digital products by following us on Etsy.


