Introduction
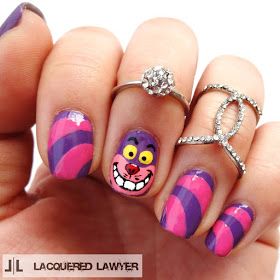
If you’re a Disney fan looking to take your nail art to the next level, you’ve come to the right place! In this article, we’ll provide you with some fun and creative Disney nail art ideas that you can easily recreate at home. From classic characters like Mickey Mouse to modern favorites like Elsa from Frozen, there’s something for everyone in this roundup of Disney-inspired nail designs.
Materials Needed
- Nail polish in various colors
- Nail art brushes or dotting tools
- Nail polish remover
- Top coat
- Nail decals or stickers (optional)
Step-by-Step Disney Nail Art Tutorials
Mickey Mouse Nails
Start off by painting your nails with a white base coat. Once dry, use a black nail polish and a thin nail art brush to draw Mickey Mouse’s iconic ears on each nail. You can then use a dotting tool to create his nose and eyes. Finish off the design with a clear top coat to seal in your work of art!
Elsa from Frozen Nails
For a frosty and elegant look inspired by Elsa from Frozen, start by painting your nails with a light blue base coat. Next, use a white nail polish and a thin brush to create snowflakes or icicle designs on each nail. You can also add some glitter polish for a magical touch. Finish with a top coat for a shiny and durable finish.
Toy Story Nails
Get creative with your Toy Story-themed nails by painting each nail a different color representing characters like Woody, Buzz Lightyear, Jessie, and more. You can use nail decals or stickers to add character faces or logos for an extra fun touch. Finish with a top coat to protect your design and make it last longer.
The Little Mermaid Nails
To create a sea-inspired manicure inspired by The Little Mermaid, start off by painting your nails with a turquoise or teal base coat. Use a purple nail polish and a thin brush to create underwater elements like seashells, starfish, or even Ariel herself. Add some glitter polish for a sparkly finish, and seal the design with a top coat.
Tips for Long-Lasting Disney Nail Art
- Apply a base coat before painting your nails to prevent staining and help your polish last longer.
- Use thin layers of nail polish to avoid streaks and bubbles in your design.
- Wait for each layer of polish to dry completely before applying the next one to prevent smudging.
- Seal your nail art with a top coat to protect it from chipping and make it last longer.
- Avoid using your nails as tools to prevent damage to your nail art.
Conclusion
Whether you’re a Disney fanatic or just looking to add some fun and creativity to your nail art, these Disney-inspired designs are sure to make a statement. With a little practice and the right tools, you can recreate these magical manicures at home and show off your love for all things Disney. So gather your nail polish collection and get ready to unleash your inner Disney princess or hero with these enchanting nail art ideas!
You can review our digital products by following us on Etsy.


