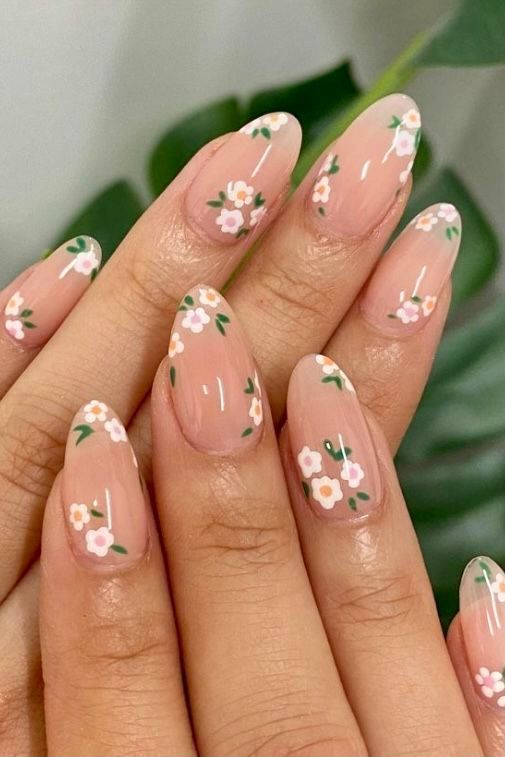


How to Achieve Pretty Spring Flower Nails
Spring is the perfect time to show off your creative and colorful nail art, and flower nails are a popular trend that never goes out of style. If you want to embrace this pretty spring nail trend, here are some suggestions on how to achieve beautiful flower nails that will make your manicure stand out.
Step 1: Choose the Right Base Color
- Start by choosing a light and fresh base color for your nails. Pastel shades like baby pink, mint green, or sky blue are perfect for creating a spring-inspired look.
- Apply a base coat to protect your nails and help the polish adhere better. Let it dry completely before moving on to the next step.
Step 2: Pick Your Flower Design
- There are many different ways to incorporate flowers into your nail art. You can opt for simple daisy designs, intricate roses, or even mix and match different flower patterns on each nail for a more eclectic look.
- Consider using nail art stickers, decals, or stamping kits to achieve a professional-looking floral design, especially if you’re not confident in your freehand nail art skills.
Step 3: Choose Your Color Palette
- Decide on a color palette for your floral design. For a classic look, you can use pastel hues like yellow, pink, and lavender. If you prefer a bolder appearance, consider using bright and vibrant colors like red, orange, and teal.
- Think about the overall aesthetic you want to achieve and choose colors that complement each other well.
Step 4: Gather Your Tools
- Make sure you have all the necessary tools and supplies for creating your flower nails. This may include nail polish in your chosen colors, a small nail art brush, dotting tools, and top coat to seal in your design.
- If you’re using nail art stickers or decals, have them ready to apply once your base color is completely dry.
Step 5: Create Your Floral Design
- If you’re doing a freehand floral design, start by using a small nail art brush to paint the outline of your flower petals and leaves. Take your time and work slowly to achieve precision.
- If you’re using nail art stickers or decals, carefully apply them to the desired nails and press them down firmly to ensure they adhere properly.
- If you’re using stamping kits, follow the instructions provided to transfer the floral designs onto your nails with ease.
Step 6: Add Finishing Touches
- Once your floral design is complete, apply a top coat to seal in your artwork and add shine to your nails. This will also help protect your design from chipping and extend the longevity of your manicure.
- Use a clean-up brush dipped in nail polish remover to tidy up any stray polish or clean up the edges of your nails for a polished look.
Step 7: Show Off Your Pretty Spring Flower Nails
Now that your flower nails are complete, it’s time to show them off! Take some photos and share them on social media to inspire others to embrace this lovely spring nail trend.
With these steps and suggestions, you can achieve pretty spring flower nails that are perfect for the season. Get creative with different flower designs and color combinations to express your unique style and have fun with your nail art!
You can review our digital products by following us on Etsy.


