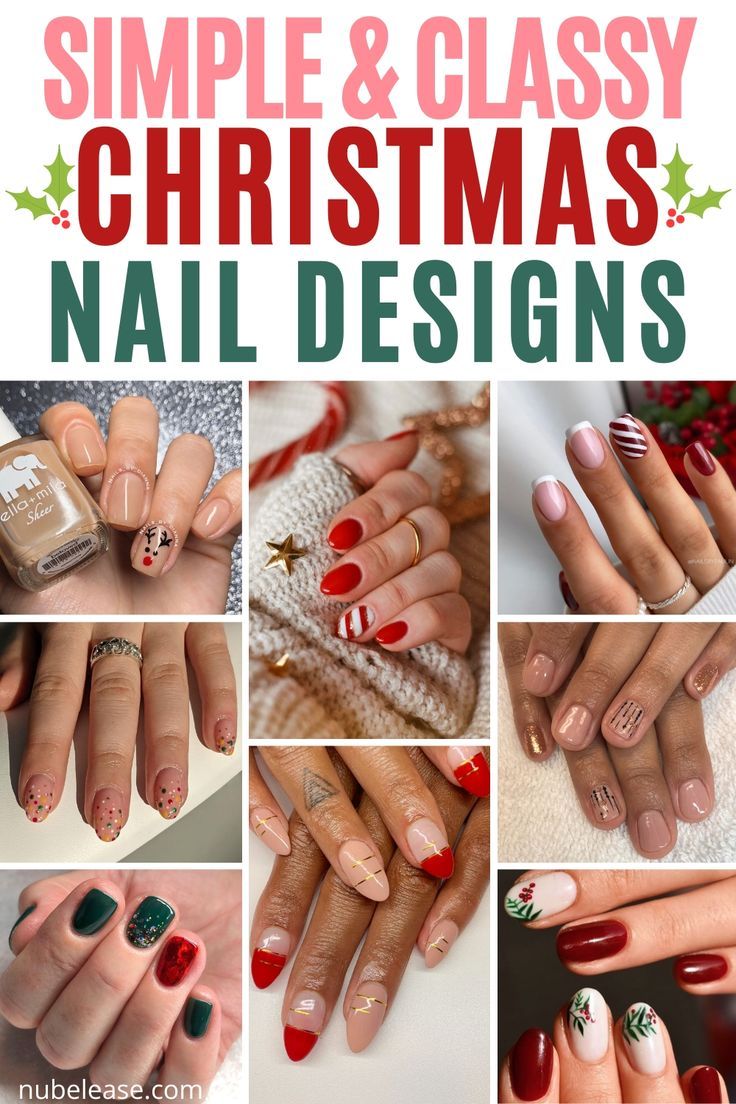


1. Candy Cane Nails
Start with a base coat of white polish and once dried, use a thin nail art brush or a striping tape to create red stripes on your nails. You can also use a red nail polish striper for a more precise and clean look. Finish with a top coat to seal in the design and add a glossy finish.
2. Metallic Christmas Tree Nails
Apply a metallic green polish as the base color and use a detail brush to create small triangles for the Christmas tree shape. Add a gold or silver star on top and use a dotting tool to create ornaments with different colored metallic polishes. Finish with a top coat for a shiny and festive look.
3. Snowflake Nails
Start with a light blue or silver base coat and use a white nail art pen or a small brush to create delicate snowflake designs. You can also use a stamping plate for more intricate designs. Add some iridescent glitter for a snowy effect and seal it in with a top coat.
4. Holly and Berries Nails
For this classic Christmas design, start with a red base coat and use a detail brush to create green holly leaves and red berries. You can also use nail stickers for an easier application. Finish with a top coat for a shiny and polished look.
5. Sparkly Gradient Nails
Start with a light color as the base and use a makeup sponge to create a gradient with a sparkly or glitter polish. You can use different color combinations like silver and blue or gold and red to match the festive theme. Finish with a top coat to blend the colors and add shine.
6. Elegant French Manicure with a Twist
Instead of the classic white tips, use metallic gold or silver for a festive twist on the French manicure. You can also add small red or green accents as a tip design for an added holiday touch. Finish with a top coat to seal in the design and add a glossy finish.
7. Festive Plaid Nails
Start with a red base coat and use striping tape to create a plaid design with green and gold or silver nail polish. Once the design is set, remove the striping tape and finish with a top coat for a smooth and polished look.
8. Glittery Reindeer Nails
Apply a nude or light brown base coat and use a detail brush to create cute reindeer designs with brown or black polish. Add some gold or silver glitter for a festive touch and finish with a top coat to seal in the design and add a glossy finish.
9. Elegant Lace Nails
Start with a sheer or nude base coat and use a white or silver lace nail sticker for an elegant and classy look. You can also use a lace nail stamping plate for a more intricate design. Finish with a top coat for a smooth and polished finish.
10. Festive Christmas Sweater Nails
Start with a white or light blue base coat and use a small nail art brush to create festive sweater patterns with red, green, and white nail polish. You can also use nail stickers for an easier application. Finish with a top coat for a shiny and polished look.
There you have it – 10 simple and classy Christmas nail designs to try this year! Whether you’re a nail art pro or just starting, these designs are sure to add a festive touch to your holiday look. Get creative and have fun with different color combinations and designs to match your holiday style. Don’t forget to finish off each design with a top coat for a long-lasting and glossy finish. Happy holidays and happy nail art-ing!
You can review our digital products by following us on Etsy.


