
Christmas Tree Nail Art: The Perfect Festive Manicure
As the holiday season approaches, it’s time to start thinking about how to add some festive flair to your look. One fun and stylish way to embrace the Christmas spirit is with Christmas tree nail art. This adorable and eye-catching manicure is perfect for any holiday gathering or simply to bring some joy to your everyday life. With a few simple steps and the right tools, you can create a stunning Christmas tree nail art design that will get you into the holiday spirit in no time.
Step 1: Gather Your Supplies
The first step in creating Christmas tree nail art is to gather all the necessary supplies. You will need a base coat, green nail polish, assorted nail art tools such as dotting tools and fine brushes, as well as red, gold, and silver nail polish for decorating the Christmas tree. Additionally, don’t forget your favorite top coat to seal in your festive design and make it last through all your holiday celebrations.
Step 2: Prep Your Nails
Before you begin creating your Christmas tree nail art, it’s essential to prepare your nails. Start by shaping and filing your nails to your desired length and shape. Once your nails are prepped, apply a base coat to protect your natural nails and provide a smooth surface for the green nail polish. Once the base coat is dry, apply 2-3 coats of green nail polish to each nail, ensuring a solid and even color.
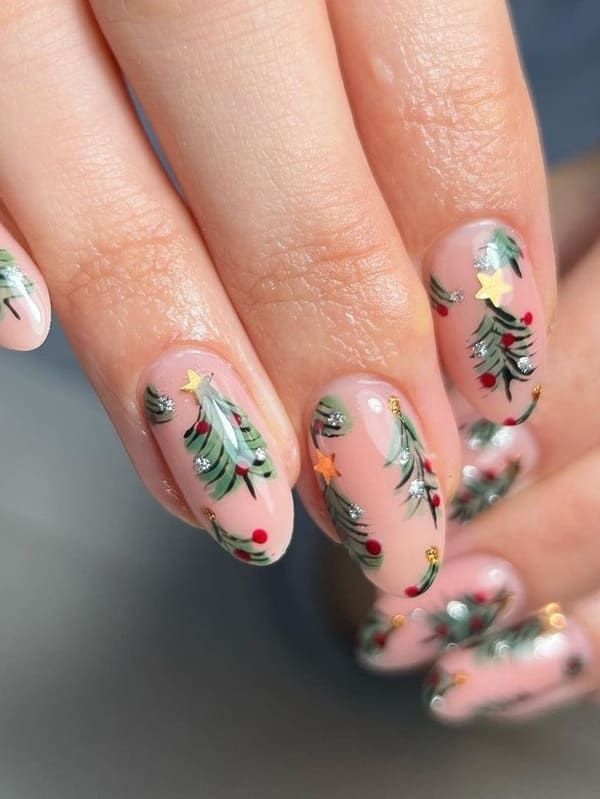
Step 3: Create the Christmas Tree Design
Once your green nail polish is dry, it’s time to create the Christmas tree design. Using a fine nail art brush or a toothpick, create a triangle shape in the center of your nail with brown nail polish to represent the tree trunk. Then, using the same tool, add small dots or lines of red, gold, and silver nail polish to create baubles and tinsel on the tree. You can also use a dotting tool to create a star at the top of the tree with yellow or gold nail polish.
Step 4: Add Final Touches and Seal in Your Design
Once you’re satisfied with your Christmas tree nail art design, it’s time to add the final touches. Using a fine brush or dotting tool, add a few white dots to represent snow on the branches of the tree. After completing the design, allow it to dry completely before applying a top coat to seal in your festive creation and add a glossy finish. This will not only protect your nail art but also make it last throughout the holiday season.
Additional Tips and Ideas for Christmas Tree Nail Art
When creating your Christmas tree nail art, don’t be afraid to get creative and add your own personal touch. You can experiment with different shades of green for the tree, use glitter nail polish for added sparkle, or add other festive designs such as presents or snowflakes to complement your Christmas tree manicure. Additionally, if you’re short on time, consider using nail stickers or decals to achieve the Christmas tree look with minimal effort.
In Conclusion
Christmas tree nail art is the perfect way to embrace the holiday spirit and add some festive flair to your look. With a few simple steps and the right tools, you can create a stunning Christmas tree nail art design that will have everyone admiring your festive manicure. Whether you’re attending a holiday party or simply want to spread some Christmas joy, this adorable and eye-catching nail art is sure to delight. So, gather your supplies, get creative, and let the Christmas magic shine through your nails this holiday season.
In summary, Christmas tree nail art is a festive and stylish way to celebrate the holiday season, and with a few simple steps and the right tools, you can create a stunning Christmas tree nail art design.
1. Gather your supplies including base coat, green nail polish, assorted nail art tools, and red, gold, and silver nail polish.
2. Prep your nails by shaping and filing, applying a base coat, and 2-3 coats of green nail polish.
3. Create the Christmas tree design by using a fine nail art brush or a toothpick, adding a triangle shape in the center with brown nail polish for the tree trunk, and adding small dots or lines of red, gold, and silver nail polish for decorations.
4. Add final touches such as snow and a star, then seal in your design with a top coat.
5. Experiment with different shades of green, glitter polish, or nail stickers to personalize your Christmas tree nail art.
So, embrace the holiday spirit and let the Christmas magic shine through your nails with a sprinkle of Christmas tree nail art this holiday season.
You can review our digital products by following us on Etsy.


