

How to Achieve Elegant Gold Nails
Gold nails can bring a touch of elegance to any outfit, making them the perfect accessory for any special occasion or even just for everyday wear. Whether you prefer a subtle shimmer or bold metallic finish, there are countless ways to achieve stunning gold nails. In this article, we will explore 25 different gold nail designs that you can try for yourself to elevate your look and add a touch of sophistication to your outfit.
1. Start with a Clean Canvas
Before you begin creating your gold nail masterpiece, it’s important to start with a clean canvas. Remove any old nail polish and trim and shape your nails to your desired length and style. Use a cuticle pusher to gently push back your cuticles and then use a nail buffer to smooth out the surface of your nails. Once your nails are prepped and ready, apply a base coat to protect your nails and help your gold nail polish adhere better.
2. Classic Gold French Tips
- Apply a nude or sheer pink nail polish as a base color.
- Using a thin nail brush, carefully paint the tips of your nails with a metallic gold polish to create a traditional French manicure look.
- Finish with a clear top coat to seal in the design and add shine.
3. Gold Glitter Ombre
- Apply a neutral base color and let it dry completely.
- Using a makeup sponge, dab a gold glitter polish onto the tips of your nails, gradually fading it up towards the cuticle.
- Layer the glitter polish until you achieve your desired level of sparkle.
- Finish with a top coat to smooth out any rough texture and seal in the glitter.
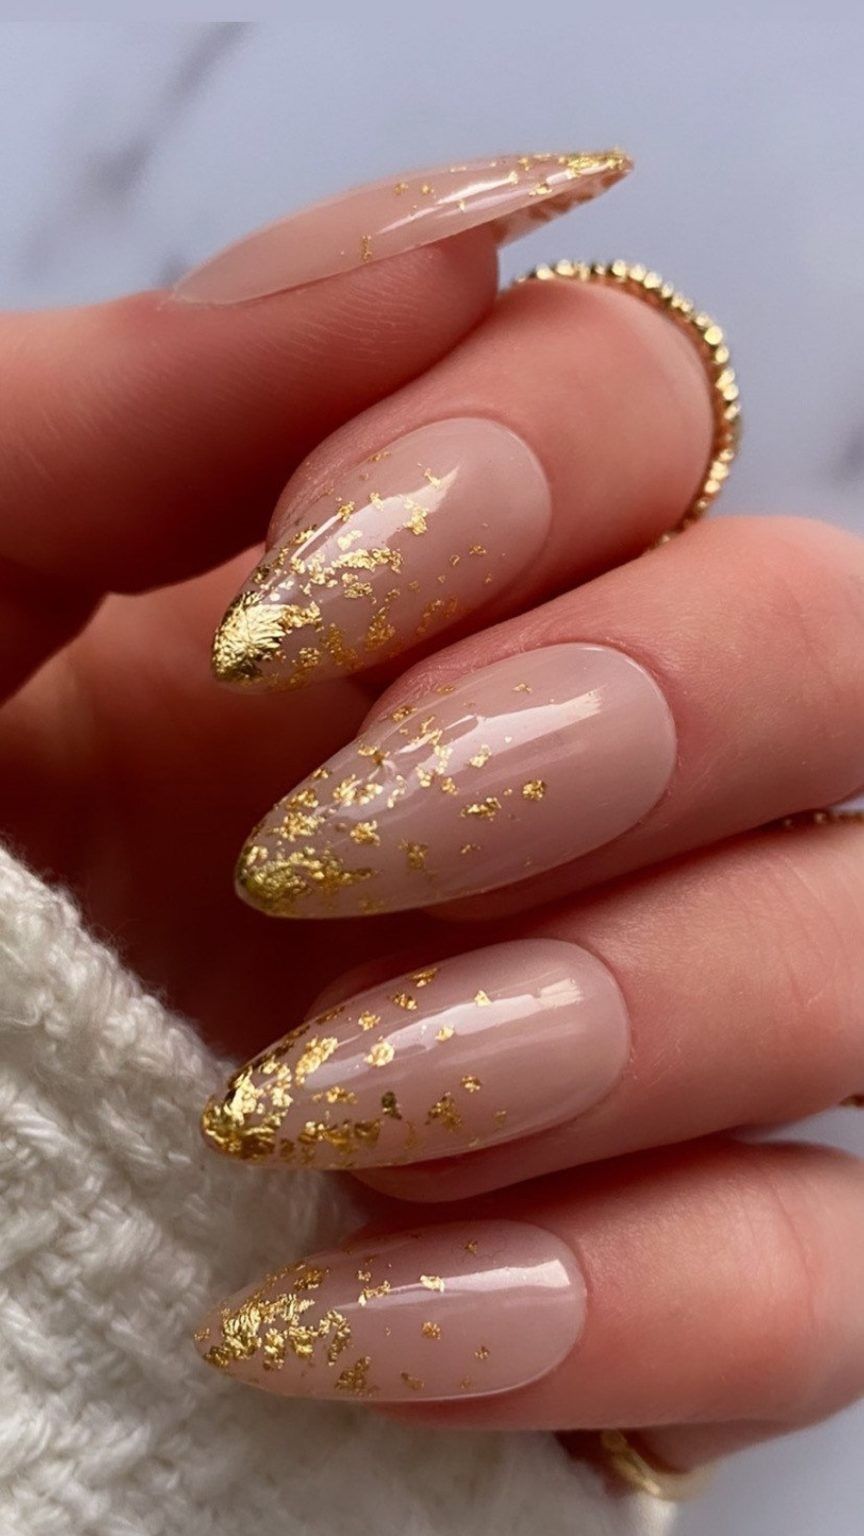
4. Gold Foil Accents
- Apply a dark polish, such as black or deep burgundy, as a base color.
- While the polish is still tacky, carefully place small pieces of gold foil onto your nails using tweezers.
- Gently press the foil onto the nail to adhere it, and then seal the design with a top coat.
5. Gradient Gold Nails
- Apply a light nude polish as a base color and let it dry completely.
- Using a makeup sponge, create a gradient effect by dabbing gold nail polish onto the tips of your nails and blending it towards the middle of the nail.
- Finish with a top coat to blend the colors and add a glossy finish.
6. Striped Gold Nails
- Apply a neutral base color and let it dry completely.
- Using striping tape, create vertical or horizontal lines on your nails, leaving space for the gold polish in between the tape.
- Fill in the gaps with a metallic gold polish and carefully remove the tape to reveal crisp, clean lines.
- Finish with a top coat to seal in the design.
7. Stamped Gold Designs
- Apply a light colored base polish and let it dry completely.
- Use a stamping plate and stamping polish to transfer intricate gold designs onto your nails.
- Finish with a top coat to protect the design and add shine.
8. Gold Leaf Nails
- Apply a dark base color, such as navy or maroon, and let it dry completely.
- Using a nail adhesive, carefully place small pieces of gold leaf onto your nails, arranging them in a random or structured pattern.
- Gently press the gold leaf onto the nail to adhere it, and then seal the design with a top coat.
9. Marbled Gold Nails
- Apply a white or light gray base color and let it dry completely.
- Using a water marble technique, create swirling patterns on the surface of the water using gold nail polish.
- Dip your nails into the water to transfer the marbled design onto your nails, and then clean up any excess polish around your nails.
- Finish with a top coat to protect the design.
10. Matte Gold Nails
- Apply a metallic gold polish and let it dry completely.
- Finish with a matte top coat to transform the shiny polish into a sophisticated, velvety finish.
11. Polka Dot Gold Nails
- Apply a light colored base polish and let it dry completely.
- Using a dotting tool or the back of a bobby pin, create simple polka dot patterns on your nails using gold polish.
- Finish with a top coat to protect the design and add shine.
12. Floral Gold Nails
- Apply a nude or pastel base color and let it dry completely.
- Using a fine nail brush or nail art pen, create delicate floral designs on your nails using gold polish.
- Finish with a top coat to protect the design.
13. Half-Moon Gold Nails
- Apply a neutral base color and let it dry completely.
- Using reinforcement stickers or hole reinforcement labels, create half-moon shapes near the base of your nails.
- Fill in the exposed area with a metallic gold polish and carefully remove the stickers while the polish is still wet to reveal clean, curved lines.
- Finish with a top coat to seal in the design.
14. Geometric Gold Nails
- Apply a solid base color and let it dry completely.
- Using striping tape or nail art stencils, create various geometric shapes on your nails, leaving space for the gold polish in between the tape.
- Fill in the gaps with a metallic gold polish and carefully remove the tape or stencils to reveal crisp, clean lines.
- Finish with a top coat to protect the design.
15. Abstract Gold Nails
- Apply a light colored base polish and let it dry completely.
- Create freeform shapes and lines on your nails using a nail art brush and gold polish, allowing your creativity to flow and creating a unique, abstract design.
- Finish with a top coat to protect the design and add shine.
16. Holographic Gold Nails
- Apply a holographic gold nail polish and let it dry completely.
- Voila! The holographic effect alone will add an instant touch of elegance to your nails.
- Finish with a top coat to protect the holographic finish.
17. Glitter Gradient Gold Nails
- Apply a light colored base polish and let it dry completely.
- Using a makeup sponge, create a gradient effect by dabbing gold glitter nail polish onto the tips of your nails and blending it towards the middle of the nail.
- Finish with a top coat to smooth out any rough texture and seal in the glitter.
18. Sparkling Gold Nails
- Apply a clear base coat to your nails and let it dry completely.
- Carefully place gold rhinestones or sequins onto your nails using a dotting tool or tweezers to create a dazzling, sparkling effect.
- Finish with a top coat to seal in the embellishments.
19. Gold and Black Color Block
- Apply a metallic gold nail polish to one half of your nail, leaving the other half bare.
- Fill in the other half with a solid black nail polish to create a bold color block design.
- Finish with a top coat to protect the design.
20. Gold and White Marble Nails
- Start with a white base color and let it dry completely.
- Using a water marble technique, create swirling patterns on the surface of the water using gold and white nail polish.
- Dip your nails into the water to transfer the marbled design onto your nails, and then clean up any excess polish around your nails.
- Finish with a top coat to protect the design.
21. Gold and Red Vintage Glam
- Apply a deep red nail polish as a base color and let it dry completely.
- Using a fine nail brush, create intricate swirls, curls, and other vintage patterns on your nails using gold polish.
- Finish with a top coat to protect the design and add shine.
22. Gold and Green St. Patrick’s Day Nails
- Apply a dark green or emerald nail polish as a base color and let it dry completely.
- Using a nail art brush or nail art pen, create four-leaf clovers, leprechaun hats, or other St. Patrick’s Day themed designs on your nails using gold polish.
- Finish with a top coat to protect the design.
23. Gold and Pink Valentine’s Day Nails
- Apply a light pink nail polish as a base color and let it dry completely.
- Using a nail art brush or nail art pen, create hearts, cupids, or other Valentine’s Day themed designs on your nails using gold polish.
- Finish with a top coat to protect the design.
24. Gold and Blue Nautical Nails
- Apply a navy blue or ocean blue nail polish as a base color and let it dry completely.
- Using a fine nail brush or nail art pen, create anchors, ship wheels, or other nautical themed designs on your nails using gold polish.
- Finish with a top coat to protect the design.
25. Gold and Silver Duo Chrome Nails
- Apply a gold nail polish to one half of your nail, leaving the other half bare.
- Fill in the other half with a silver nail polish to create a stunning duo chrome effect.
- Finish with a top coat to protect the design and add shine.
With these 25 gold nail designs, you can easily add an elegant touch to your outfits for any occasion. Whether you prefer a classic French tip, a bold geometric design, or a festive holiday themed nail art, there is a gold nail design for everyone. Experiment with these designs and techniques to find the perfect gold nails that suit your personal style and elevate your look with a touch of sophistication and glamour.
You can review our digital products by following us on Etsy.


